Ultimate New York-Style Cheesecake
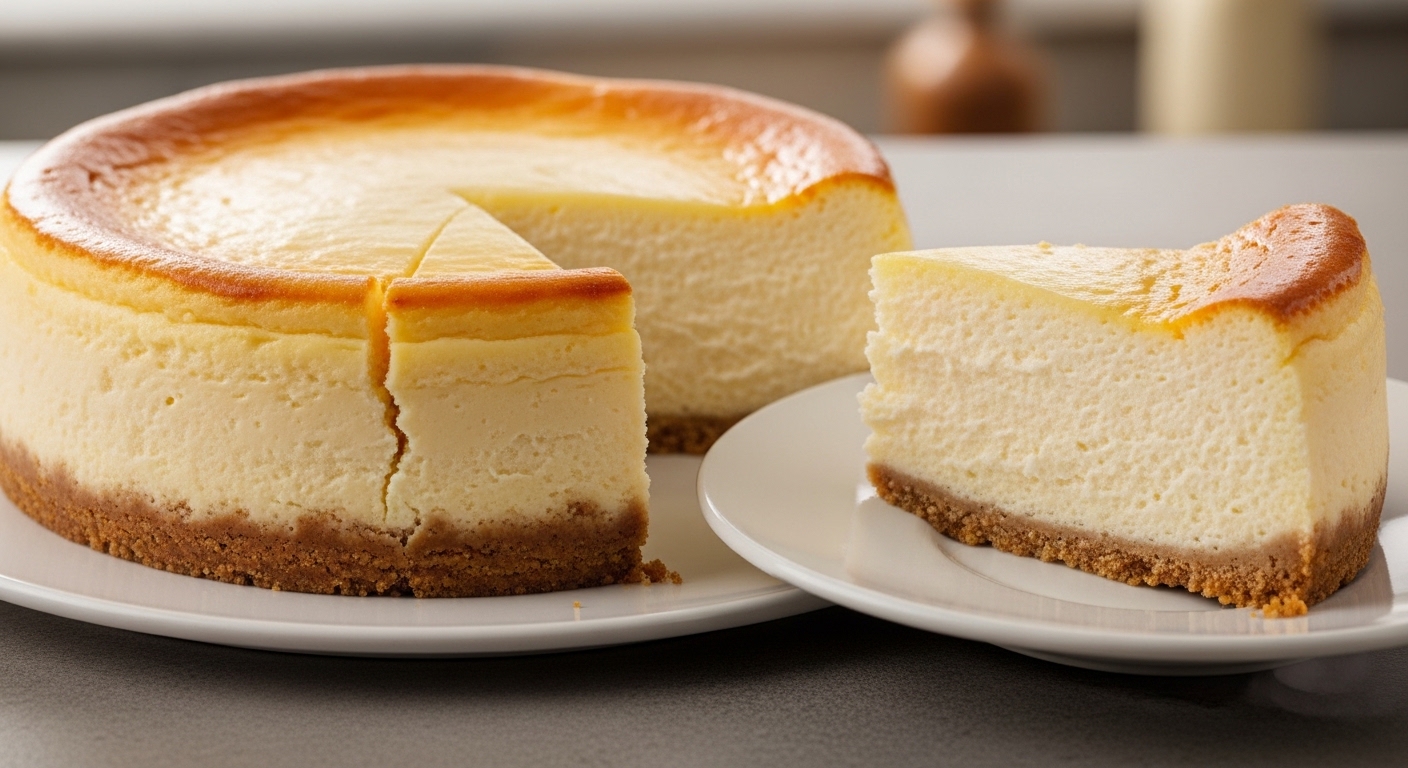
A proper New York-style cheesecake is one of the most satisfying things you can bake, and also one of the most unforgiving. There’s nowhere to hide—no layers of frosting, no flashy decorations, no sauce to mask imperfections. It’s just a dense, silky-smooth cream cheese filling on a crisp, buttery crust. When it’s done right, the texture is almost indescribable—not quite a custard, not quite a mousse, but something uniquely its own. It should be dense without being heavy, rich without being cloying, and completely smooth from edge to center.
The Room Temperature Rule
If there is one piece of advice I could drill into every home baker’s mind about cheesecake, it’s this: every single ingredient must be at room temperature before you start mixing. Not “I left it out for twenty minutes and it still feels a little cool.” Genuinely, completely room temperature.
Here’s why this matters so much. Cold cream cheese is firm and lumpy. When you beat cold cream cheese, those lumps don’t fully break down, and they get sealed inside the batter along with pockets of air. Those lumps show up as unpleasant dense spots in the finished cheesecake, and those air pockets expand in the oven and cause the surface to crack.
Take the cream cheese out of the refrigerator at least two hours before you plan to start baking—four hours is even better. The eggs and sour cream need about an hour. This single step prevents about eighty percent of the problems people encounter with cheesecake.
Building the Crust
The crust is straightforward but there are a few details that make a difference. Crush the graham crackers until they’re uniformly fine—no large pieces. I pulse them in a food processor, but you can also seal them in a zip-top bag and crush them with a rolling pin. Mix the crumbs with sugar, salt, and melted butter until everything is evenly moistened.
Press the crumb mixture firmly and evenly into the bottom and about one inch up the sides of a nine-inch springform pan. Use the flat bottom of a measuring cup to compact it—the tighter you press, the sturdier the crust will be. Bake the crust at 325°F (160°C) for about ten minutes until it’s set and lightly golden. Let it cool while you make the filling. Pre-baking the crust is essential—it prevents it from becoming soggy once the wet filling goes in.
Making a Crack-Free Filling
-
Beat the cream cheese: Using a stand mixer fitted with the paddle attachment (not the whisk—the whisk incorporates too much air), beat the room-temperature cream cheese on medium speed until it’s completely smooth. This takes about three minutes. Scrape down the sides and bottom of the bowl frequently—cream cheese loves to hide in the corners.
-
Add the sugar: With the mixer on medium-low, gradually add the sugar and beat until combined, about two minutes. The mixture should be smooth and slightly fluffy.
-
Add the sour cream and flavorings: Mix in the sour cream, vanilla extract, lemon zest, and lemon juice until just combined. The sour cream adds tanginess and a lighter texture. The lemon zest and juice aren’t enough to make it taste like lemon—they just brighten the overall flavor and prevent the cheesecake from tasting flat or one-dimensional.
-
Add the eggs one at a time: This is where restraint becomes critical. Add the eggs one at a time, mixing on low speed after each addition until just incorporated. Do not overmix. Every revolution of the paddle after the eggs are mixed in is adding air to the batter, and air is the enemy of a smooth, crack-free top. The flour goes in last, folded in gently on the lowest speed setting.
-
Pour and bake: Pour the filling over the pre-baked crust. Tap the pan firmly on the counter a few times to release any large air bubbles. Now, here’s the key technique for preventing cracks: bake the cheesecake in a water bath. Wrap the outside of the springform pan in two layers of heavy-duty aluminum foil (to prevent water from seeping in), place it in a larger roasting pan, and pour hot water into the roasting pan until it reaches about halfway up the sides of the springform pan.
Bake at 325°F (160°C) for about one hour and fifteen minutes. The cheesecake is done when the edges are set and slightly puffed, but the center still has a visible wobble—like Jell-O, not liquid. It will look underdone. That’s exactly right. The center continues to set as it cools.
-
Cool gradually: Turn off the oven, crack the door open about an inch, and let the cheesecake cool inside the oven for one hour. Sudden temperature changes are what cause cracks—the outer edges cool and contract faster than the still-warm center, and the surface tears. This gradual cooling minimizes that thermal stress.
-
Chill overnight: After the oven cool-down, remove the cheesecake, run a thin knife around the edge to release it from the sides of the pan (this also prevents cracking as it contracts), and refrigerate uncovered for at least eight hours, ideally overnight. The cheesecake needs this time for the texture to fully set—a warm cheesecake that’s been refrigerated for only a few hours will be soft and slightly grainy compared to one that’s had a full overnight rest.
Understanding the Water Bath
The water bath serves two critical purposes. First, it provides gentle, even heat. The water moderates the temperature around the cheesecake, so instead of blasting the edges with direct dry oven heat (which causes the edges to set long before the center, resulting in cracks and an uneven texture), the heat transfers gently through the water and cooks the cheesecake uniformly.
Second, the evaporating water fills the oven with steam, which keeps the surface of the cheesecake moist. A dry oven environment causes the surface to crust over and dry out, making it more prone to cracking.
If you absolutely can’t be bothered with a water bath, place a pan of hot water on the rack below the cheesecake. It’s not as effective, but the steam will still help somewhat.
Troubleshooting
- Cracked top: Almost always caused by overbaking, too much air in the batter, or too-rapid cooling. Follow the gradual cooling process.
- Grainy texture: Usually from undermixed cream cheese (cold lumps) or overbaked. The cream cheese must be truly smooth before adding other ingredients.
- Water in the crust from the water bath: Double-wrap the foil carefully. Alternatively, place the springform pan inside a slightly larger cake pan—it acts as a secondary barrier.
- Sinking in the center: This happens when the cheesecake is overbaked—it puffs up too high from excessive air and collapses as it cools. Mix less, bake less.
Serving and Storing
Remove the cheesecake from the refrigerator about thirty minutes before serving to take the chill off—it tastes best when it’s cool but not ice-cold. For clean slices, dip a sharp knife in hot water and wipe it clean between each cut.
A classic New York cheesecake needs no topping at all—it’s meant to be eaten plain to appreciate the pure, dense richness of the filling. But if you want something extra, a thin layer of fresh strawberry compote, a drizzle of salted caramel, or simply a handful of fresh berries are beautiful accompaniments. Store covered in the refrigerator for up to five days, or freeze individual slices wrapped tightly in plastic for up to two months.

About the Author
Makutu Bright
Software engineer and founder of Cracipes. Based in Kumasi, Ghana. Uses AI to curate the best recipes from across the internet.
Learn More
Submission Received!
Your review is in the kitchen being moderated.