Beginner's Guide to Homemade Sourdough Bread
Sourdough bread is one of those things that seems intimidating until you actually start doing it, and then it becomes second nature. The learning curve is real—your first loaf probably won’t look like the ones on Instagram, and that’s completely fine. But once you understand what’s actually happening with the dough at each stage, you’ll start producing bread that’s better than anything you can buy at most bakeries. The crackling crust, the tangy crumb, the way it fills your entire kitchen with the most incredible smell—it’s worth every bit of the effort.
Understanding Your Sourdough Starter
Before you even think about baking, you need an active, healthy sourdough starter. A starter is a living culture of wild yeast and lactic acid bacteria that you maintain by regularly feeding it flour and water. The wild yeast provides the leavening (the rise), and the bacteria produce lactic and acetic acids, which give sourdough its characteristic tangy flavor.
If you don’t have a starter yet, making one from scratch takes about seven to ten days. Combine equal parts flour and water by weight in a jar, leave it loosely covered at room temperature, and feed it daily by discarding half and adding fresh flour and water. By the end of the first week, it should be reliably doubling in size within four to six hours of feeding—that’s when it’s ready to bake with.
The float test is a simple way to check if your starter is ready: drop a small spoonful into a glass of water. If it floats, the starter has produced enough gas and is active enough to leaven bread. If it sinks, give it another feeding and try again in a few hours.
The Importance of Hydration
This recipe uses a hydration of seventy percent, which means the water weight is seventy percent of the flour weight. That’s a good middle ground for beginners. Higher hydration doughs (seventy-five to eighty-five percent) produce bread with a more open, irregular crumb and a thinner crust, but they’re significantly harder to handle because they’re wet and sticky. Lower hydration doughs are easier to shape but tend to produce a tighter crumb.
Water temperature matters more than most beginners realize. The temperature of your water directly affects the temperature of your dough, which in turn affects how fast the fermentation happens. I aim for a final dough temperature of about 78°F (25°C). In a warm kitchen, use cooler water. In a cold kitchen, use warmer water. This is the kind of small adjustment that separates consistent results from unpredictable ones.
The Process, Step by Step
-
Autolyse: Combine the flour and water in a large bowl and mix until no dry flour remains. Cover the bowl and let it rest for thirty to sixty minutes. During this rest, the flour fully absorbs the water and the gluten proteins begin to organize themselves into a network without any kneading. When you come back to the dough after the autolyse, you’ll notice it’s already smoother and more extensible. This step makes everything that follows easier.
-
Add the starter and salt: After the autolyse, add the sourdough starter and salt to the dough. The easiest way to incorporate them is using the “pinch and fold” method—literally pinch the dough with your thumb and forefinger, cutting through it, then fold it over itself. Rotate the bowl and repeat. Do this for about three to four minutes until the starter and salt are fully incorporated and the dough feels cohesive.
-
Bulk fermentation with stretch and folds: This is where the magic happens. Over the next four to six hours (depending on your kitchen temperature), you’ll perform a series of stretch and folds every thirty minutes for the first two hours, then leave the dough undisturbed for the remainder. To do a stretch and fold, wet your hands, grab one side of the dough, stretch it up as far as it’ll go without tearing, and fold it over to the opposite side. Rotate the bowl ninety degrees and repeat. Do this four times to complete one set.
These stretch and folds develop gluten strength, incorporate air, and help equalize the dough temperature. After four to six sets, you’ll notice the dough has transformed from a shaggy, slack mass into something smooth, pillowy, and full of air. By the end of bulk fermentation, the dough should have increased in volume by about fifty to seventy-five percent—not double, as you might expect from commercial yeast recipes. It should look puffy, feel airy, and jiggle when you shake the bowl.
-
Pre-shape: Gently turn the dough out onto a lightly floured surface. Using a bench scraper, fold the edges toward the center to create a rough round shape, then flip it over so the seam side is down. Let it rest for twenty to thirty minutes. This pre-shape gives the dough structure while allowing the gluten to relax before the final shape.
-
Final shape: After the bench rest, lightly flour the top of the dough and flip it over. Pull the bottom edge up to the center, fold the sides in, then roll it toward you to create a tight round (or oval for a batard shape). The surface tension on the bottom of the loaf is important—it’s what helps the bread hold its shape as it rises and bakes. Place the shaped dough seam-side up into a well-floured proofing basket (banneton). Rice flour works best for dusting the basket because it doesn’t absorb moisture the way wheat flour does, so the dough won’t stick.
-
Cold retard: Cover the basket with a damp towel or plastic wrap and place it in the refrigerator for twelve to sixteen hours (overnight). The cold slows fermentation dramatically, which accomplishes two things: it develops a deeper, more complex, tangier flavor, and it makes the dough much easier to score and handle before baking because cold dough holds its shape better.
-
Bake: Preheat your oven to 500°F (260°C) with a Dutch oven inside for at least forty-five minutes. The preheated Dutch oven acts as a mini steam oven—when you drop the cold dough inside and cover it with the lid, the moisture escaping from the dough creates steam, which keeps the crust soft long enough for the bread to fully expand (called “oven spring”). Bake covered for twenty minutes, then remove the lid, reduce the temperature to 450°F (230°C), and bake for another twenty to twenty-five minutes until the crust is deeply golden brown. The internal temperature should read about 205-210°F (96-99°C) when it’s done.
-
Cool completely: This is the hardest part—you have to let the bread cool for at least one hour on a wire rack before cutting into it. The interior is still cooking and setting from residual heat during this time. Cutting too early results in a gummy, underdone interior.
Troubleshooting Common Issues
- Dense crumb: Usually caused by underfermentation during bulk fermentation. Let the dough go longer, or use a warmer spot in your kitchen.
- Too sour: Reduce the cold retard time, or use a higher ratio of starter to flour. Warmer fermentation also favors milder lactic acid over sharper acetic acid.
- No oven spring: Your dough may be overproofed, or your scoring isn’t deep enough. The score should be about a quarter-inch deep at a thirty-degree angle.
- Sticking to the banneton: Use more rice flour next time, and make sure the surface of the shaped dough isn’t too wet before placing it in the basket.
Why It’s Worth the Effort
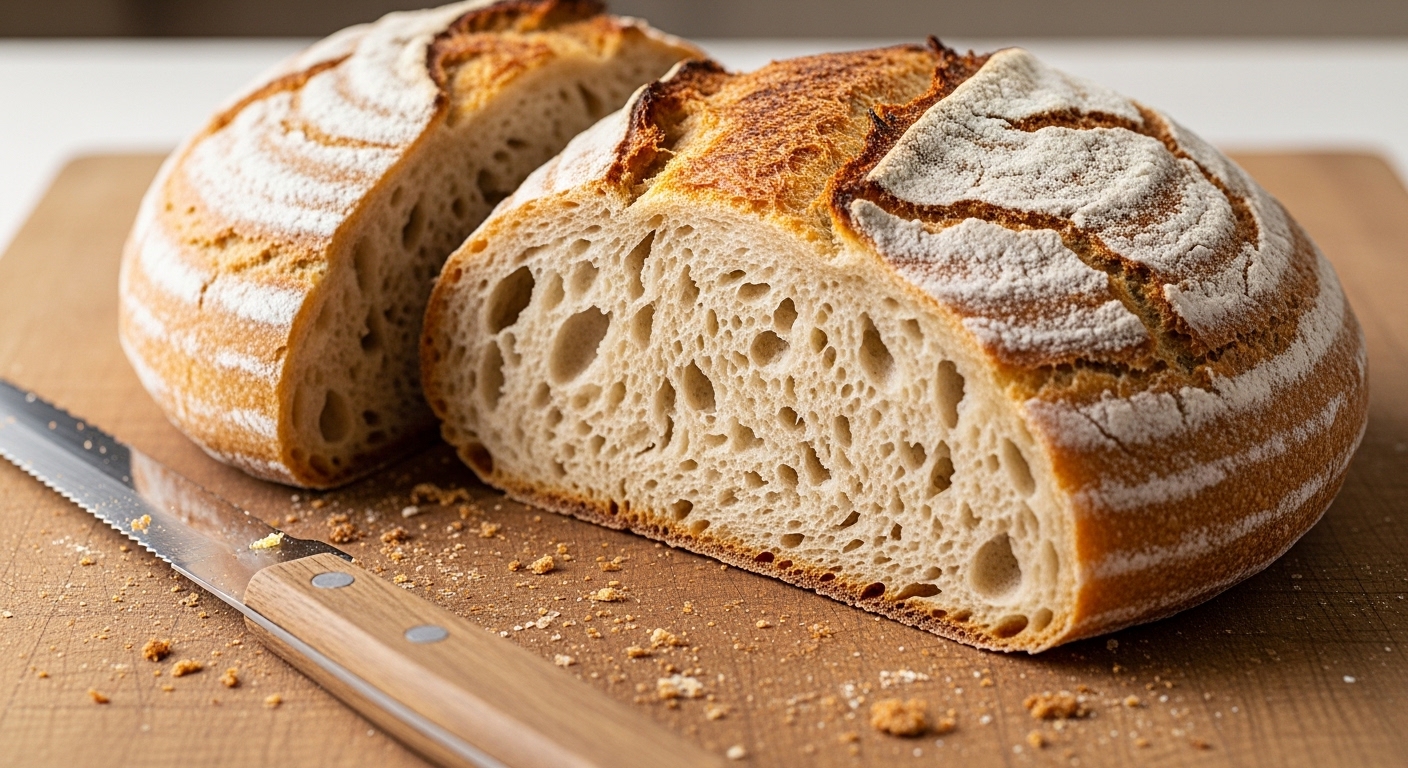
Once you’ve baked your first successful loaf—when you hear that hollow knock on the bottom, when you see the ear on the score pull back beautifully, when you slice into it and see those open, glossy pockets in the crumb—you’ll understand why people get obsessed with this. Good sourdough bread is alive in a way that commercial bread simply isn’t. Every loaf is slightly different because the fermentation is influenced by temperature, humidity, and the unique microbial ecosystem in your starter. It connects you to a tradition of breadmaking that goes back thousands of years.

About the Author
Makutu Bright
Software engineer and founder of Cracipes. Based in Kumasi, Ghana. Uses AI to curate the best recipes from across the internet.
Learn More
Submission Received!
Your review is in the kitchen being moderated.