Moist and Flavorful Banana Bread
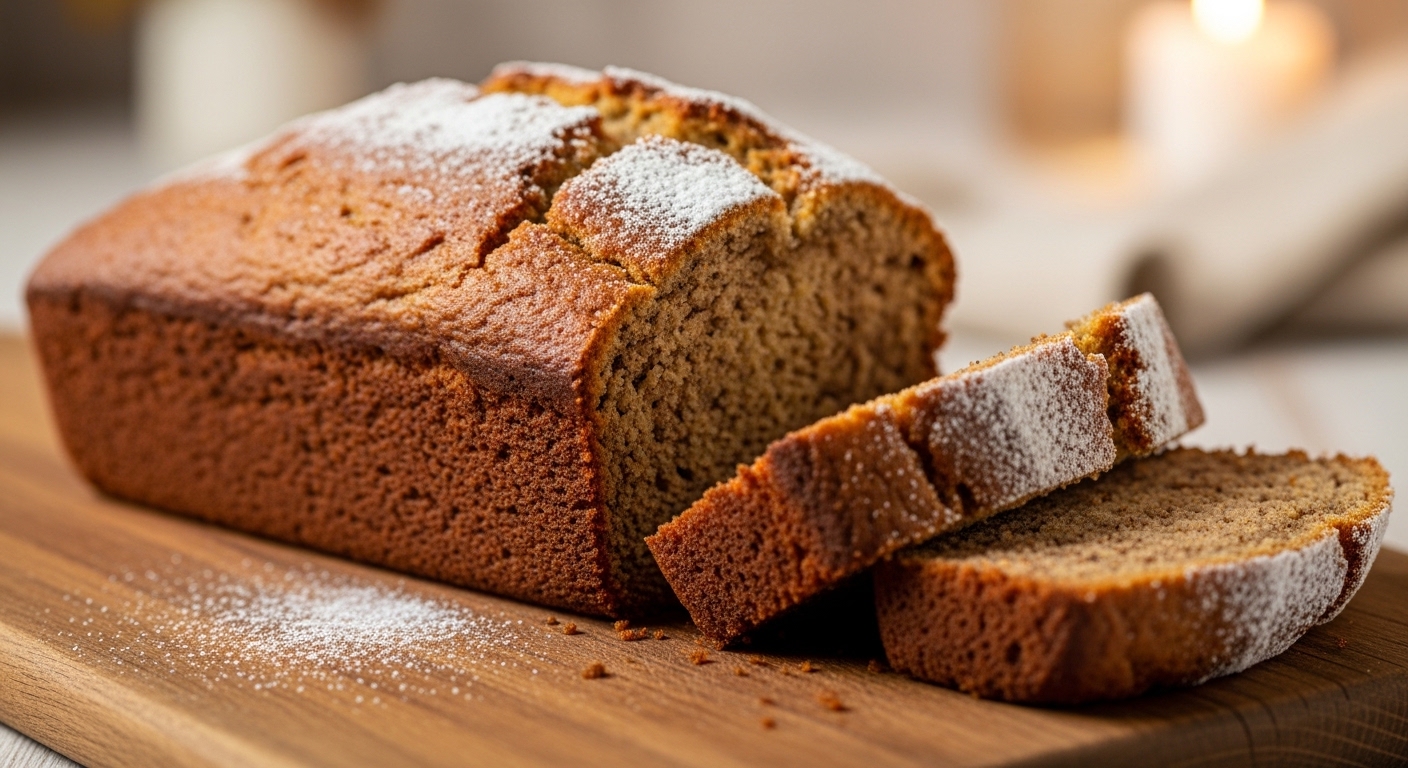
Never throw away overripe bananas—they are the secret to the best banana bread. Keep a stash of spotted, blackened bananas in the freezer for whenever the craving strikes. It might seem counterintuitive to bake with fruit that looks past its prime, but the uglier the banana, the better the bread will taste. As bananas ripen past the stage where you’d want to eat them fresh, the starches convert to sugars, the fruit becomes softer and more aromatic, and the intense banana flavor concentrates. A banana that’s still yellow and firm will give you bland, starchy bread. A banana that’s almost completely black will give you bread that actually tastes like banana.
The Science of Overripe Bananas
There’s real food science behind this. When a banana ripens, enzymes break down the complex starches in the fruit into simple sugars—primarily sucrose, glucose, and fructose. A green banana is about one percent sugar by weight, while an overripe banana can be up to twenty percent sugar. That’s a twentyfold increase in sweetness and flavor. The cellular structure also breaks down, making the fruit softer and easier to mash, which means it incorporates more smoothly into the batter and distributes banana flavor more evenly throughout the bread.
The dark spots on the peel correspond to areas where the cell walls have completely broken down and the sugars have begun to caramelize slightly. When you peel a truly overripe banana, it should be very soft, deeply fragrant, and almost custard-like in texture. If your bananas haven’t reached this stage yet, you can speed up the process: place unpeeled bananas on a baking sheet and roast them at 300°F (150°C) for about fifteen to twenty minutes until the skins are completely black and the fruit inside is soft and syrupy. Let them cool before peeling. This isn’t quite as good as natural ripening, but it does convert the starches to sugars and produces much better results than using underripe bananas.
Why This Recipe Works
Most banana bread recipes produce acceptable but unremarkable results. This one is different because of two specific additions that address the most common complaints about banana bread: dryness and denseness.
The first is sour cream (or Greek yogurt). It adds moisture and fat, which keeps the bread incredibly moist for days after baking. The acidity also reacts with the baking soda to provide additional lift, resulting in a slightly lighter, more tender crumb. The second is melted butter instead of softened butter. Most baking recipes call for creaming softened butter with sugar to incorporate air, but banana bread doesn’t need that extra leavening—the baking soda handles the rise. Using melted butter gives the bread a denser, more fudgy texture that’s closer to what most people actually want from banana bread. It also makes the recipe incredibly easy because you don’t need a mixer or any special equipment—just a bowl and a fork.
How to Make It
-
Mash the bananas: Peel the bananas into a large mixing bowl and mash them with a fork until mostly smooth. A few small chunks are perfectly fine—they create pockets of concentrated banana flavor in the finished bread. If you want a completely uniform texture, you can use a blender or food processor, but hand-mashing gives the bread a desirable rustic consistency.
-
Mix the wet ingredients: Stir the melted butter into the mashed bananas. Add the sugar, beaten egg, vanilla extract, and sour cream, and mix until everything is well combined. The batter will look a bit lumpy and not particularly appetizing at this stage—that’s completely normal.
-
Add the dry ingredients: Sprinkle the baking soda, salt, and cinnamon over the wet mixture and stir briefly. Add the flour and fold it in gently using a spatula or wooden spoon. The most important word here is gently—overmixing develops gluten, which makes the bread tough and chewy instead of tender and cake-like. Mix until the flour is just incorporated and no dry streaks remain. If you’re adding nuts, fold them in at the very end.
-
Bake: Pour the batter into a greased 9x5 inch loaf pan and smooth the top. Bake at 350°F (175°C) for about fifty to fifty-five minutes. The bread is done when a toothpick inserted into the center comes out clean or with just a few moist crumbs clinging to it. If the top is browning too quickly before the center is done, tent it loosely with aluminum foil for the last fifteen minutes.
-
Cool properly: Let the bread cool in the pan for about ten minutes, then turn it out onto a wire rack to cool completely. Cooling in the pan too long causes condensation on the bottom, which makes the crust soggy. The bread will firm up significantly as it cools—resist the temptation to slice it while it’s still warm, as satisfying as that sounds. It will crumble and fall apart.
Variations and Add-Ins
- Chocolate chip banana bread: Fold in three-quarters of a cup of semi-sweet chocolate chips. The melting chocolate pockets against the warm banana are incredible.
- Double banana bread: Slice one additional banana (can be less ripe for this one) and lay the slices on top of the batter before baking. They caramelize on top and create a beautiful presentation.
- Brown butter banana bread: Instead of simply melting the butter, cook it in a small saucepan over medium heat until the milk solids turn golden brown and it smells nutty and toasty. Brown butter adds a deep, almost toffee-like richness that elevates the bread significantly. Let it cool slightly before adding to the bananas.
- Streusel top: Mix two tablespoons of flour, two tablespoons of brown sugar, one tablespoon of cold butter, and a pinch of cinnamon into crumbles. Scatter over the batter before baking for a crunchy, sweet top.
Storage Tips
Banana bread keeps beautifully at room temperature, wrapped tightly in plastic wrap or stored in an airtight container, for three to four days. It actually improves on the second day as the flavors meld and the crumb becomes even more moist. For longer storage, slice the bread and freeze individual slices wrapped in plastic wrap and placed in a freezer bag. They’ll keep for up to three months. Toast a frozen slice directly—it comes back to life beautifully with crispy edges and a warm, soft center.
A Few Final Tips
- Don’t throw away overripe bananas: Peel them and freeze them in a zip-top bag. When you have enough (usually three or four), thaw them in a bowl and proceed with the recipe. The liquid that pools as they thaw is full of banana flavor—include it in the batter.
- One-bowl simplicity: This entire recipe mixes in a single bowl with no electric mixer needed. It takes about five minutes to mix and less than an hour to bake. It’s one of the best effort-to-reward ratios in all of baking.
- Taste the batter: A tiny taste of the batter (before the egg is added, if raw egg concerns you) will tell you immediately if you need more sugar. The sweetness of bananas varies significantly depending on the variety and ripeness level.

About the Author
Makutu Bright
Software engineer and founder of Cracipes. Based in Kumasi, Ghana. Uses AI to curate the best recipes from across the internet.
Learn More
Submission Received!
Your review is in the kitchen being moderated.