Fluffy Buttermilk Pancakes – The Ultimate Breakfast Delight
The Golden Morning Glow
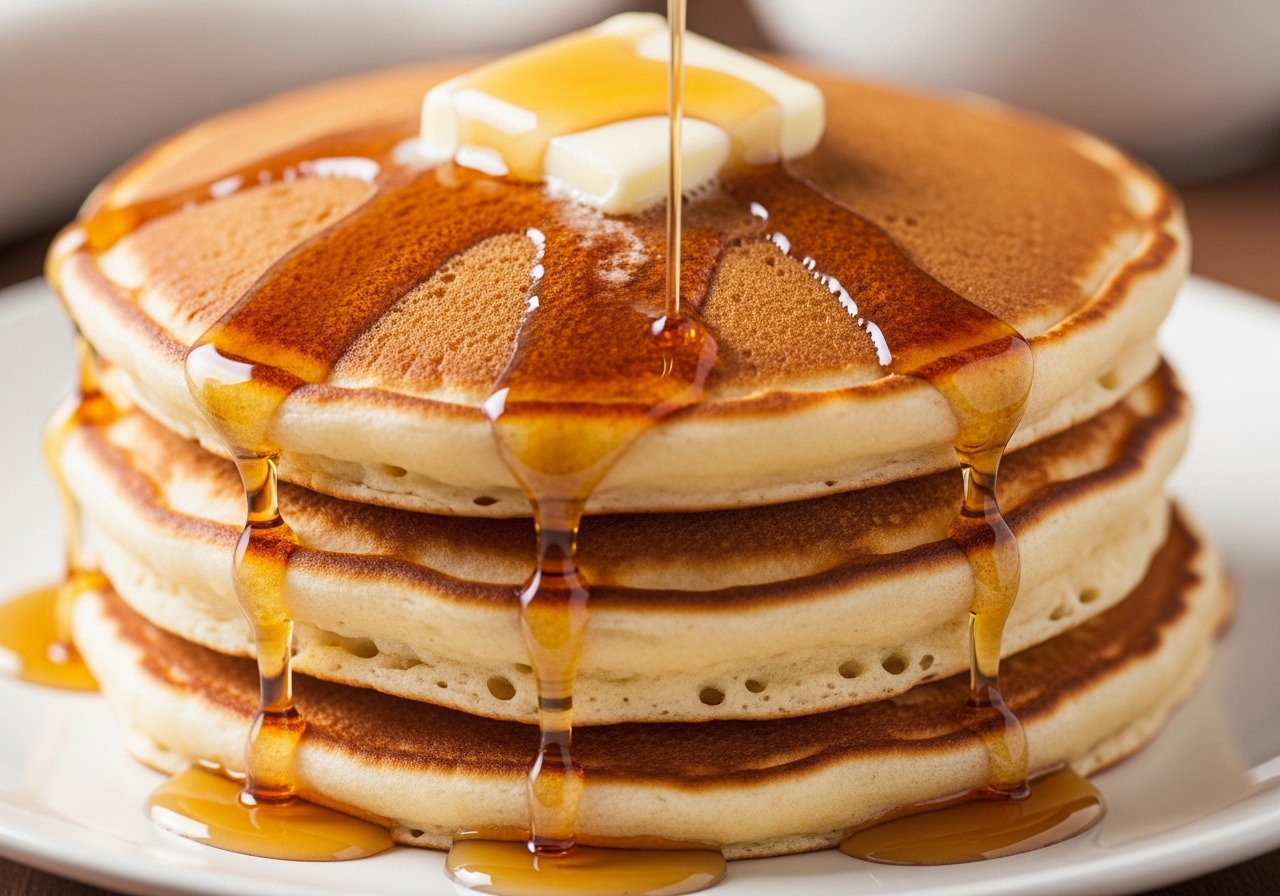
There is something inherently comforting about a lazy weekend morning, the sunlight filtering through the kitchen window as the coffee brews. But the real star of the show? The aroma of freshly cooked pancakes wafting through the air. Imagine a towering stack of golden, pillowy pancakes, each one catching a glisten of maple syrup as it drips down the sides. These Fluffy Buttermilk Pancakes aren’t just breakfast; they are a celebration of the simple joys that make home feel like the best place on earth.
Whether you’re hosting a festive brunch or just treating the family to a special Saturday morning, this recipe is your ticket to pancake perfection. It’s impressively delicious yet wonderfully simple, proving that the most memorable meals often come from the most humble ingredients.
A Brief Love Letter to the Pancake
Pancakes in some form have been around for thousands of years. Ancient Greeks and Romans ate flat cakes made from wheat, olive oil, honey, and curdled milk. The modern buttermilk pancake as we know it really took shape in North America during the 1800s, when baking powder became widely available and transformed the flat, dense griddle cake into the fluffy, leavened stack we know and love today. Every culture has its own version—French crêpes, Japanese souffle pancakes, Ethiopian injera, Dutch pannenkoeken—but the American buttermilk pancake holds a special place in breakfast culture because of its perfect balance of tender crumb, slight tang, and golden, buttery exterior.
What makes this particular recipe stand out from the hundreds of pancake recipes out there is its emphasis on technique. The ingredients themselves are basic pantry staples, but how you handle them makes the difference between a flat, rubbery disk and a cloud-like pillow of breakfast perfection.
Why This Recipe Works: The Science of Fluffy
The secret to that signature “lift” and cloud-like texture lies in the chemistry between the buttermilk and the leavening agents. The acidity of the buttermilk reacts with the baking soda to create tiny carbon dioxide bubbles, which get trapped in the batter and expand in the heat of the pan. This is what gives buttermilk pancakes their distinctive rise and airy interior. The baking powder provides an additional boost through a double-acting leavening process—it releases gas once when it gets wet and again when exposed to heat.
Combined with the rich flavor of melted butter and a hint of sweetness from the sugar, these pancakes are a masterpiece of balance. The buttermilk also tenderizes the gluten in the flour, which is why buttermilk pancakes have that melt-in-your-mouth quality that pancakes made with regular milk simply cannot match.
Understanding this chemistry explains why the most important rule in pancake making is to never overmix the batter. Every stir develops the gluten in the flour, making the pancakes tougher and chewier. Those lumps in your batter are not mistakes—they are your insurance policy for fluffy pancakes.
Step-by-Step to Perfection
- Mix Dry Ingredients: In a large, inviting bowl, whisk together your flour, sugar, baking powder, baking soda, and salt. This ensures everything is evenly distributed for a consistent rise. Take thirty seconds to whisk these dry ingredients thoroughly—this prevents any pockets of pure baking soda, which can create bitter spots in your pancakes.
- Combine Wet Ingredients: In a separate bowl, beat the eggs with the buttermilk and melted butter. Make sure the melted butter has cooled slightly before adding it to the buttermilk, or it can cause the buttermilk to curdle in unpleasant ways. This creates a rich, creamy base for your batter.
- Make the Batter: Gently pour the wet ingredients into the dry. Here is the golden rule: Stir until just combined. Use a wooden spoon or rubber spatula and fold the mixture together with as few strokes as possible—usually about fifteen to twenty stirs is all you need. Lumps are not your enemy—they are the secret to keeping the pancakes light. Overmixing will result in a tough, dense texture that nobody wants.
- Let the Batter Rest: This is a step that many recipes skip, but it makes a noticeable difference. Let the batter sit for five minutes after mixing. During this time, the baking soda continues to react with the buttermilk, creating even more air bubbles, and the gluten relaxes, resulting in even more tender pancakes. You will actually see the batter puff up slightly during the rest.
- Cook the Pancakes: Heat a non-stick skillet or griddle over medium heat and lightly grease with a pat of butter. To test if the pan is ready, sprinkle a few drops of water on the surface—they should dance and sizzle before evaporating. Pour about 1/4 cup of batter for each pancake. Watch for those beautiful bubbles to form on the surface and the edges to look slightly set—that’s your signal to flip. This usually takes about two to three minutes. Cook until the second side is a perfect, sun-kissed golden brown, another one to two minutes.
- Serve: Stack them high! Add a generous pat of butter between layers so it melts down through the stack, a drizzle of high-quality maple syrup, and perhaps a handful of fresh berries for a pop of color and freshness.
Tips for the Perfect Stack
- Handle with Care: Remember, the less you mix, the fluffier they will be. Stop stirring as soon as the flour streaks disappear. A few lumps remaining in the batter is perfectly fine and actually preferable.
- The Heat Check: If your pancakes are browning too fast but staying raw inside, lower the heat slightly. Patience is key to that even golden finish. Medium heat is almost always the right choice—high heat burns the outside before the inside cooks through.
- The Warmth Factor: Keep your finished pancakes in a low oven at about 200°F on a wire rack to keep them warm and prevent the bottoms from getting soggy while you finish the rest of the batch. Stacking them on a plate under a towel traps steam and makes the bottoms soft.
- The Flip Technique: Only flip once! Multiple flips deflate the air bubbles you worked so hard to create. Wait for those surface bubbles and then commit to a confident, single flip.
- Buttermilk Substitute: If you don’t have buttermilk on hand, you can make a quick substitute by adding one tablespoon of white vinegar or lemon juice to one cup of regular milk and letting it sit for five minutes until it curdles slightly. It won’t be identical to real buttermilk, but it provides enough acidity to react with the baking soda.
Delightful Variations
While the classic is hard to beat, these pancakes are a versatile canvas for creative additions:
- Fruit & Chocolate: Fold in a handful of blueberries, chocolate chips, or thin banana slices just before flipping. Drop the add-ins onto the batter in the pan rather than mixing them into the bowl—this way you can control the distribution and prevent the fruit from breaking down and turning the batter blue or gray.
- Dairy-Free Twist: Swap the buttermilk for almond milk mixed with a tablespoon of lemon juice or a dollop of dairy-free yogurt. Use coconut oil or vegan butter in place of the regular butter.
- Spice it Up: A pinch of cinnamon or a grate of fresh nutmeg in the dry mix adds a warm, cozy aromatic layer that is especially wonderful in autumn and winter.
- Lemon Ricotta: Add a half cup of ricotta cheese and the zest of one lemon to the wet ingredients for incredibly moist, tender pancakes with a subtle citrus brightness.
- Whole Wheat: Replace half the all-purpose flour with whole wheat flour for a heartier, nuttier pancake that still stays fluffy thanks to the buttermilk chemistry.
Choosing the Right Maple Syrup
A quick word about syrup, because it matters more than you might think. There is a world of difference between genuine maple syrup and the corn syrup-based “pancake syrups” that dominate grocery store shelves. Real maple syrup is made from the concentrated sap of maple trees and has a complex, nuanced sweetness with notes of caramel, vanilla, and even a slight smokiness depending on the grade. Grade A Dark or Grade A Very Dark has the most robust flavor and stands up beautifully to the rich, tangy buttermilk pancakes. It costs more, but a little goes a long way, and once you taste the real thing, the imitation versions will never satisfy you again.
Serving Suggestions
For a truly memorable brunch, pair your stacks with a side of crispy bacon or savory breakfast sausage. The salty, smoky protein contrasts beautifully with the sweet, fluffy pancakes. A dollop of freshly whipped cream or a dusting of powdered sugar can elevate the presentation from home-cooked to gourmet.
For a more indulgent spread, set up a pancake bar with toppings like fresh berries, sliced bananas, toasted nuts, whipped butter, Nutella, peanut butter, and a selection of syrups. Let everyone customize their own stack—it’s interactive, fun, and guarantees that everyone gets exactly what they want.
These pancakes are more than just a recipe — they’re an invitation to slow down, savor the moment, and enjoy a bit of breakfast magic. Once you’ve made them a few times, you’ll find they become second nature, and that stack of golden, fluffy pancakes will become a weekend tradition you look forward to every week.

About the Author
Makutu Bright
Software engineer and founder of Cracipes. Based in Kumasi, Ghana. Uses AI to curate the best recipes from across the internet.
Learn More
Submission Received!
Your review is in the kitchen being moderated.